Foundation Options
Three ways to build your foundation.
Most of our customers choose a stone pad—it's the best balance of cost, drainage, and durability for sheds and mid-size garages. Here's how they compare.
 Most Popular
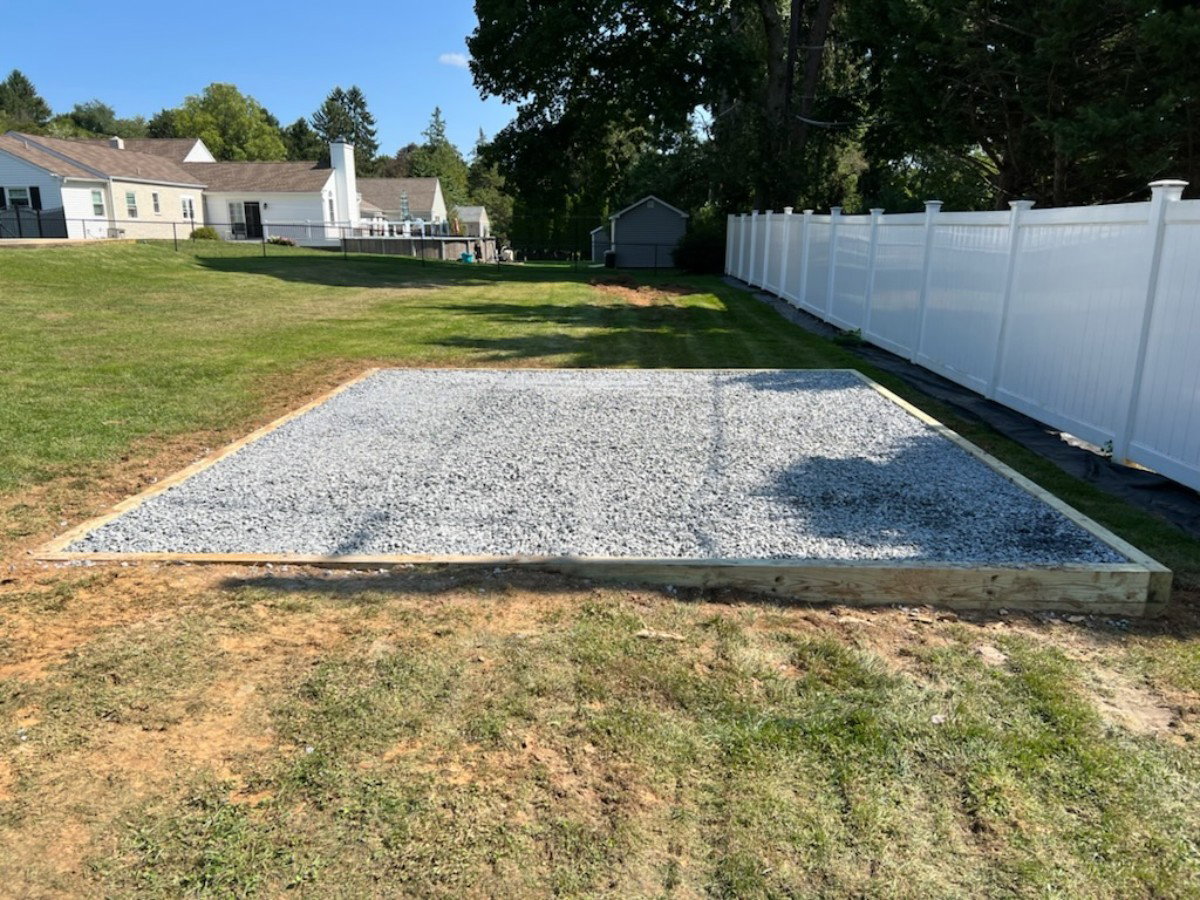
Stone Pad Foundation
Our most popular foundation option using ¾″ crushed stone for excellent drainage and durability. Includes ground leveling, pressure-treated 4×6 perimeter with rebar stakes, and weed barrier.
- Excellent drainage properties
- More cost-effective option
- Faster installation process
- Perfect for most shed applications
Best for: Storage sheds, workshops, and most residential applications
 Premium
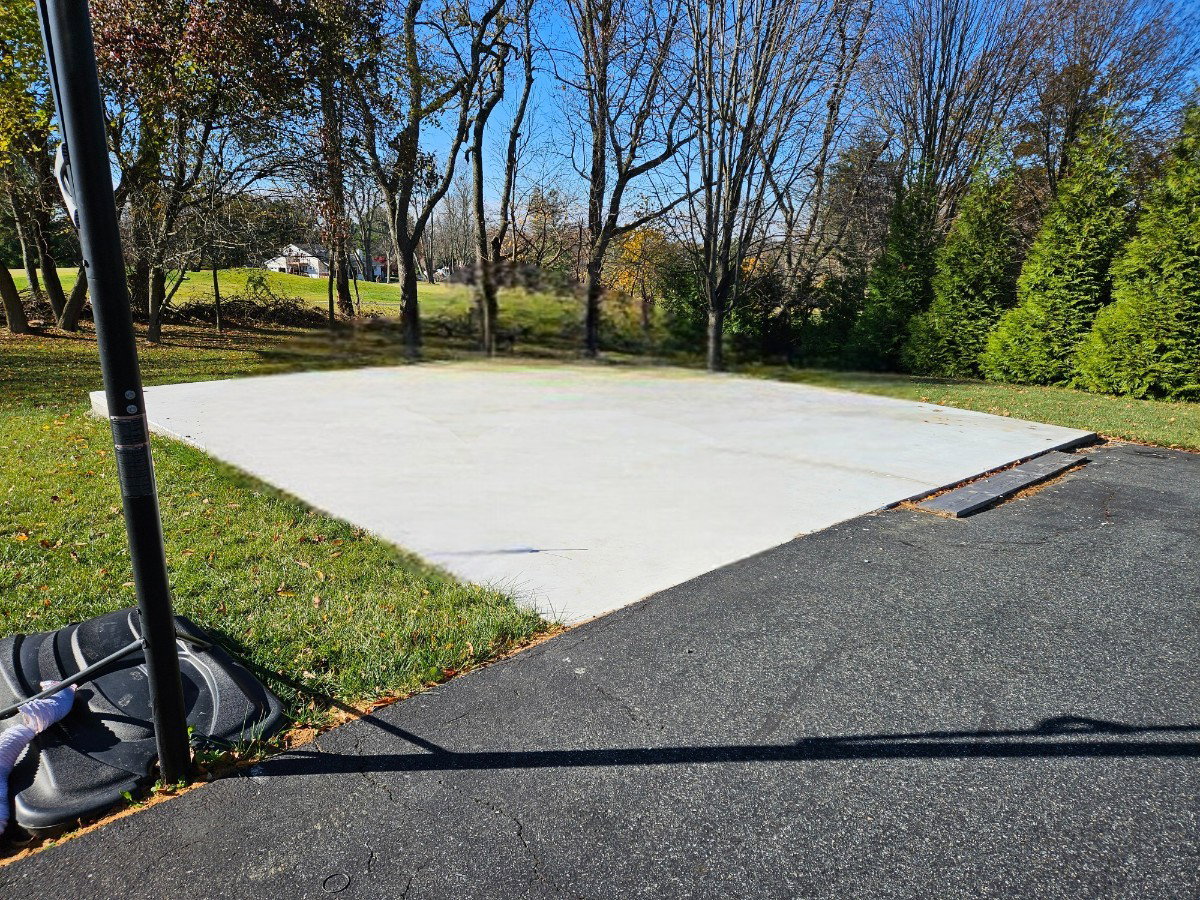
Concrete Pad Foundation
Premium concrete foundation for maximum durability and the most stable base for your structure. Available as monolithic (one-pour) or block foundation with 36″ deep frostwall.
- Maximum stability and durability
- Perfect for heavy-duty applications
- Ideal for garages and workshops
- Long-term investment value
Best for: Garages, large workshops, and structures requiring maximum stability
Concrete Pier Foundation
SpecialtyIndividual concrete piers for structures that don’t require a full foundation. Professional excavation, high-strength concrete, and proper depth for local frost requirements.
- Professional excavation and placement
- High-strength concrete construction
- Proper frost depth compliance
- Multiple sizes available (12″–36″)
Best for: Certain shed and specialty structure applications where full foundations aren’t needed